I cut the facings way too narrow. The buttons with the lace around them simply did not fit any way I tried it. There was only one option left. Ordering more fabric, and re-cutting all yellow parts.
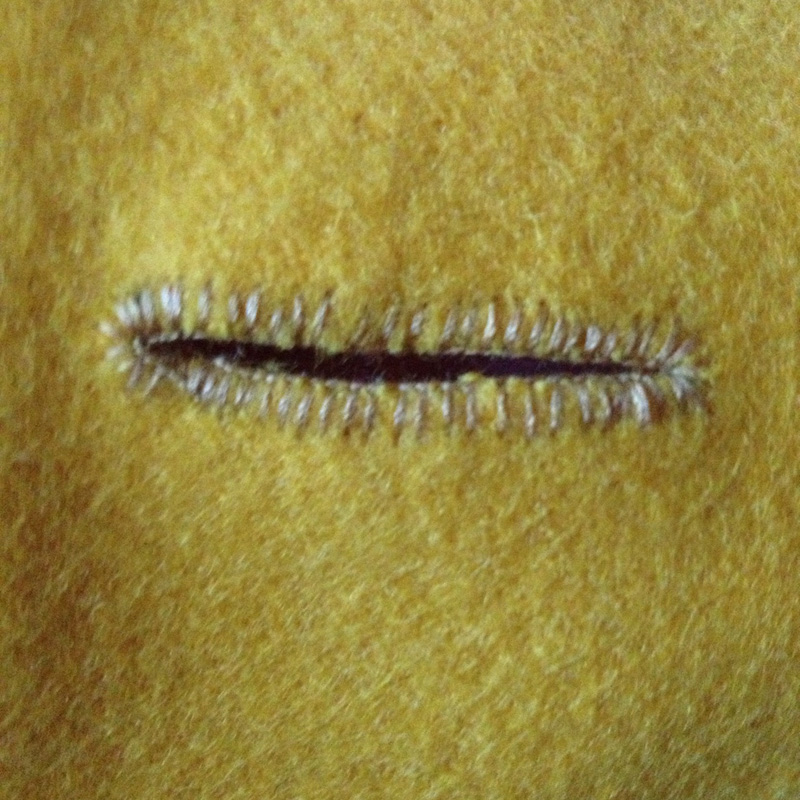
Burnley and Trowbridge had a lovely yellow wool broadcloth for $25 a yard. It's lighter than my original color, but still in theme. I just used the IXth infantry grunt uniform for reference on the shape and width of the collar and facings. It's much wider than my original eyeballing, and you can barely tell on the color difference. Next up is handstitching buttonholes on the cuffs. I double-layered them in the yellow wool, and they were too thick for my puny machine to handle. I also added a buttonhole. The IXth uniform description calls for four buttonholes on the sleeves, but it just looked more balanced with five. Now I just have a lot of handsewing to do, and this project will be done.
Saturday, June 8, 2013
Sunday, May 26, 2013
Back to you, Nelson
I had cut the facings of the riding habit too narrow, and I ran out of the yellow wool I had. Since the riding habit project is awaiting the arrival of a new yard of dark yellow wool before construction can continue, I turned back to the Nelson coat. I really wanted to make sure the facings were a single piece so the collar could be popped like the portrait.
I attached the white wool for the facings like a lining. The two layers of blue wool that make up the collar are treated as a single piece. The white wool is then treated essentially as a lining and folded backward. I mean to tack the actual cotton lining over all of it in the finishing process. In this instance, it seems easier to show than to tell.
I've been waiting for parts, but I think I can tack the lining in before getting lace and buttons.
The facings get folded back and buttoned in place eventually. From portraits, it seems these vary in how wide they are. Captain Cook's in the 1774 portrait are quite narrow.
I attached the white wool for the facings like a lining. The two layers of blue wool that make up the collar are treated as a single piece. The white wool is then treated essentially as a lining and folded backward. I mean to tack the actual cotton lining over all of it in the finishing process. In this instance, it seems easier to show than to tell.
I've been waiting for parts, but I think I can tack the lining in before getting lace and buttons.
The facings get folded back and buttoned in place eventually. From portraits, it seems these vary in how wide they are. Captain Cook's in the 1774 portrait are quite narrow.
Monday, May 13, 2013
IXth Riding Habit Lining and Lace
I got into attaching the lining to the project, and all hell broke loose. Nothing was laying right, and I had cut the upper part of the lining almost two inches too short. [Expletive.] I frantically went through the scrap stash for the project, and hoped I had enough to cut out new lining pieces that were all one piece. I had to do some creative piecing, and long story short, I am still not happy with it. I may end up going for the two-piece lining again with a longer top piece.
Trying to do a lining for the pleated skirting is something I have never had success with. On longer things like gentlemen's frock coats, you can kind of fudge it, as the length hides the fact that the pleats aren't acting as one layer. In something shorter like this, it just looks like it rides the short bus to school. I think I may have to go back and figure out the two piece lining. It makes the pleats look really sharp. The collar and facings just didn't lay right. I came to the conclusion that the interfacing was just too thick. I am in the process of removing it. Some of these issues will be resolved when the functioning buttonholes go into the collar and facings, but the lining should not be visible where the collar joins the rest of the coat. I expect removing the thick canvas interlining will take care of that issue, but We'll find out. I may have to rig up something where the lining is tacked down by hand around the collar. That may work out better. The difference between the weight of the wool and the silk is just problematic.
Adventures in Silver Mylar LaceThe IXth enlisted lace is a worsted wool with a pair of navy blue pinstripes. We have miles and miles of it stashed away, but for something like a ladies riding habit, I wanted to go with the officers lace. I took a look at a few of the rectangles of the enlisted lace to figure out how they were constructed, and determined that it was much easier to show than it was to tell. Everyone I asked had a slightly different way of doing it, including using some kind of interfacing for the construction process, or anti fray goo. I didn't want to muck up the expensive silver lace, so I did a little experimentation using it in its original form, un-backed. It frayed very badly, and looked awful. Eventually, I figured out doing a quick buttonhole stitch in silk thread on the edges of each strip saved me a lot of headaches, frustration and lace.
Sunday, April 28, 2013
IXth of Foot Riding Habit
The inspiration: In part, this project was inspired by a BAR event in September. BAR events do not allow women in uniform, so I guess this is my quiet, and stylish way to stick it to 'em. I envisioned a riding habit styled after the IXth of Foot uniform. I started with a portrait by Sir Joshua Reynolds of Lady Worsley, completed 1776 and currently hanging in the Earl and Countess of Harewood, Harewood House, Yorkshire.
I also came across photos of Merja Palkivaara's riding habit on her blog, Before the Automobile, and I fell in love. I had to have one, but I wanted mine to follow the regimental colors and lace pattern of the IXth of Foot, my reenacting unit. Dressing in this fashion was made popular by Georgiana Spencer, the ever fabulous Duchess of Devonshire in the 1770s.

The Fabrics: I started with red worsted wool from Burnley and Trowbridge that is perfect in all ways and absolutely striking. It's a twill weave, and much deeper in color than the picture lets on.
The lining is silk taffeta in a beautiful ivory that I acquired from Osgood Textile in West Springfield. I found some lovely silk for the waistcoat there as well. The gold wool is leftover from the first run of IXth uniforms from the early 2000s.
The pattern: Mill Farm 15: Woman's Riding Habit Jacket and Waistcoat, according to Old Time Patterns, suitable for 1760 - 1780. I modified this pattern heavily for the cut-away, and the pointed waistcoat. The waistcoat that comes with the pattern is the more traditional men's style 1770s waistcoat. I ordered size 12-14 based on my measurements, but the pattern does not differentiate between 12 and 14. It simply states 12 will fit loosely, and 14 will "just" fit. I always work from a mock up, so I wasn't super worried.
The pattern has a dart across the bust that I omitted in fitting to accommodate shaping for the cut-away., and my alterations left little skirting on the front, so I'm not sure I will end up being able to do a pocket. I may still try to place a faux pocket flap just for style.
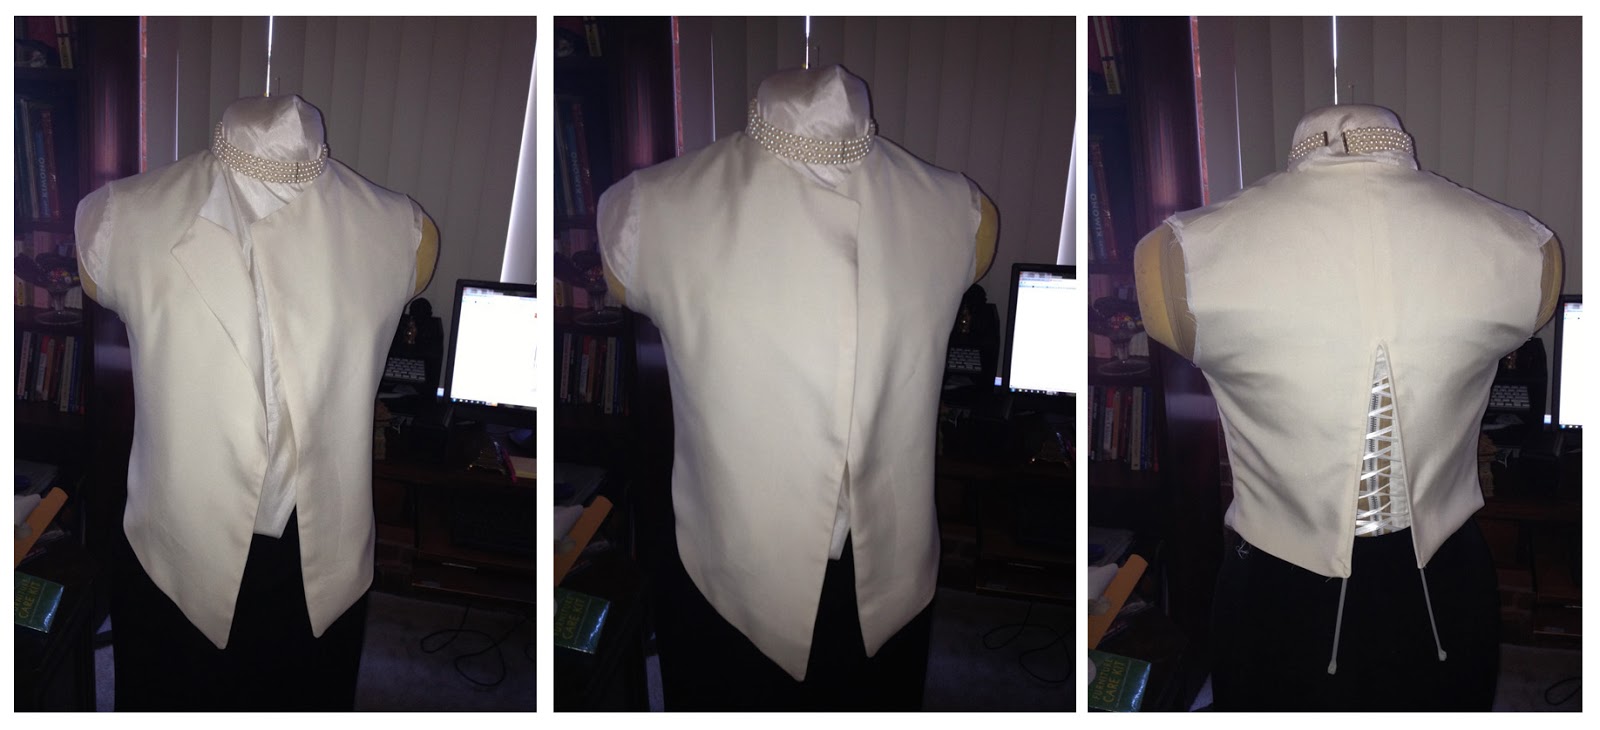
Waistcoat: Take One: I used two light weight cable ties to brace the back seam for lacing. When I tried it on, I decided I did not like how the the upper chest looked around the bust line, so I trimmed it down.
Waistcoat: Take Two: I made more of a V shape. It reduces much of the fitting issues. It will also make room for the cotton voile habit shirt and silk cravat fluffities
Progress: Looking a bit more sharp and put together. I ended up taking the pattern mock-up in considerably at the waist to create the cut-away shape. The idea is to have it all link up with one hook and eye closure
I cut out the lining in two pieces - skirting, and everything above the waist. My intention is to avoid the obnoxious problems that arise when trying to line box pleats. I think I may be on to something here.
I treated the lining and the fashion fabric as one pieces, and stitched the pleats in place. The idea is to attach the rest of the lining over it, hiding the business part of the pleating.
Constructing the Facings and Collar: Using my grungy IXth infantry grunt uniform as a starting point, I free-handed and eye-balled the facing shapes.
Getting there. I got the cuffs, collars and facings out of the one scrap of yellow wool.
The plan is to follow the lace placement patterns of the IXth uniform with silver mylar lace and fancy buttons. The collar will be interlined with cotton duck cloth I had lying around. I looked for horsehair fabric online, but was not quite sure what I needed.
Next up are some more tweaks to the waistcoat length and the jacket flaps. I think I need to order the lace and apply it to the cuffs and facings before proceeding much further.
I also came across photos of Merja Palkivaara's riding habit on her blog, Before the Automobile, and I fell in love. I had to have one, but I wanted mine to follow the regimental colors and lace pattern of the IXth of Foot, my reenacting unit. Dressing in this fashion was made popular by Georgiana Spencer, the ever fabulous Duchess of Devonshire in the 1770s.
The Fabrics: I started with red worsted wool from Burnley and Trowbridge that is perfect in all ways and absolutely striking. It's a twill weave, and much deeper in color than the picture lets on.
The lining is silk taffeta in a beautiful ivory that I acquired from Osgood Textile in West Springfield. I found some lovely silk for the waistcoat there as well. The gold wool is leftover from the first run of IXth uniforms from the early 2000s.
The pattern: Mill Farm 15: Woman's Riding Habit Jacket and Waistcoat, according to Old Time Patterns, suitable for 1760 - 1780. I modified this pattern heavily for the cut-away, and the pointed waistcoat. The waistcoat that comes with the pattern is the more traditional men's style 1770s waistcoat. I ordered size 12-14 based on my measurements, but the pattern does not differentiate between 12 and 14. It simply states 12 will fit loosely, and 14 will "just" fit. I always work from a mock up, so I wasn't super worried.The pattern has a dart across the bust that I omitted in fitting to accommodate shaping for the cut-away., and my alterations left little skirting on the front, so I'm not sure I will end up being able to do a pocket. I may still try to place a faux pocket flap just for style.
Waistcoat: Take One: I used two light weight cable ties to brace the back seam for lacing. When I tried it on, I decided I did not like how the the upper chest looked around the bust line, so I trimmed it down.
Waistcoat: Take Two: I made more of a V shape. It reduces much of the fitting issues. It will also make room for the cotton voile habit shirt and silk cravat fluffities
Progress: Looking a bit more sharp and put together. I ended up taking the pattern mock-up in considerably at the waist to create the cut-away shape. The idea is to have it all link up with one hook and eye closure
I cut out the lining in two pieces - skirting, and everything above the waist. My intention is to avoid the obnoxious problems that arise when trying to line box pleats. I think I may be on to something here.
I treated the lining and the fashion fabric as one pieces, and stitched the pleats in place. The idea is to attach the rest of the lining over it, hiding the business part of the pleating.
Constructing the Facings and Collar: Using my grungy IXth infantry grunt uniform as a starting point, I free-handed and eye-balled the facing shapes.
I traced the shape of the facings, and just sketched with a pencil on the yellow wool until I had an approximate. Attaching the facings will be a bit different from the construction of the actual private's uniform. I intend to make it a bit less rough around the edges, as these facings are just tacked on the top. I'm still cooking up construction ideas.
Getting there. I got the cuffs, collars and facings out of the one scrap of yellow wool.
The plan is to follow the lace placement patterns of the IXth uniform with silver mylar lace and fancy buttons. The collar will be interlined with cotton duck cloth I had lying around. I looked for horsehair fabric online, but was not quite sure what I needed.
Next up are some more tweaks to the waistcoat length and the jacket flaps. I think I need to order the lace and apply it to the cuffs and facings before proceeding much further.
Sunday, April 14, 2013
Mill Farm Riding Habit Pattern
Does anyone out there have any experience using the Mill Farm Riding Habit pattern? Anyone know where I can find shots of a finished project?
Thursday, February 21, 2013
18th Century Naval Inspiration
From the National Maritime Museum, Greenwich, London, Royal United Service Institution Collection
Object ID: UNI0011, circa 1774
Full dress frock coat of a Captain. The frock is of blue wool with button back lapels faced with white and edged with gold lace. Although it is possible to wear the coat with the lapels partially buttoned across the chest, there are also three hook and eye fastenings so that the coat can be closed without unbuttoning the lapels. The neckband is also edged with gold lace. The skirts are not as full as those of the late 1740s. The back vent is still edged with gold lace, as is the pocket, and the three decorative faux buttonholes on either side of the back vent are still retained.
The details on this sleeve is stunning, and you can clearly see the anchor buttons. The shot of the front has provided the much-needed detail on how many buttons up the front as well as the shape of the pockets.
I must confess, I am a little afraid of making the pleating on the coat's skirt fall correctly. I will need to examine mine and see what's what with construction. The JP Ryan pattern did have directions for it, but I am not confident.
Seeing the pattern of the lace on the back is daunting. It is breathtakingly gorgeous, and I'm sure I will need something like 20 yards of the lace.
The next step for me is to iron, and cut out the lining. I am still waiting for the white wool for the facings to come in. I haven't even ordered the buttons or the lace.
1. Lining
2. Construction of the back pleating/vents
3. Attach the lining/facings
4. Buttonholes
5. Lace
6. Buttons
7. Done.
Object ID: UNI0011, circa 1774
Full dress frock coat of a Captain. The frock is of blue wool with button back lapels faced with white and edged with gold lace. Although it is possible to wear the coat with the lapels partially buttoned across the chest, there are also three hook and eye fastenings so that the coat can be closed without unbuttoning the lapels. The neckband is also edged with gold lace. The skirts are not as full as those of the late 1740s. The back vent is still edged with gold lace, as is the pocket, and the three decorative faux buttonholes on either side of the back vent are still retained.
The details on this sleeve is stunning, and you can clearly see the anchor buttons. The shot of the front has provided the much-needed detail on how many buttons up the front as well as the shape of the pockets.
I must confess, I am a little afraid of making the pleating on the coat's skirt fall correctly. I will need to examine mine and see what's what with construction. The JP Ryan pattern did have directions for it, but I am not confident.
Seeing the pattern of the lace on the back is daunting. It is breathtakingly gorgeous, and I'm sure I will need something like 20 yards of the lace.
The next step for me is to iron, and cut out the lining. I am still waiting for the white wool for the facings to come in. I haven't even ordered the buttons or the lace.
1. Lining
2. Construction of the back pleating/vents
3. Attach the lining/facings
4. Buttonholes
5. Lace
6. Buttons
7. Done.
Wednesday, February 20, 2013
Shameless Plug - Gibson Edwardian Shoes
Lauren of American Duchess is running a promotion for her new "Gibsons" - Edwardian style shoes patterned after extant examples. I thought I would take a moment to show everyone how amazing they are. I was thinking some kidn of Downton Abbey inspired picnic as soon as it's warm enough...
Subscribe to:
Posts (Atom)